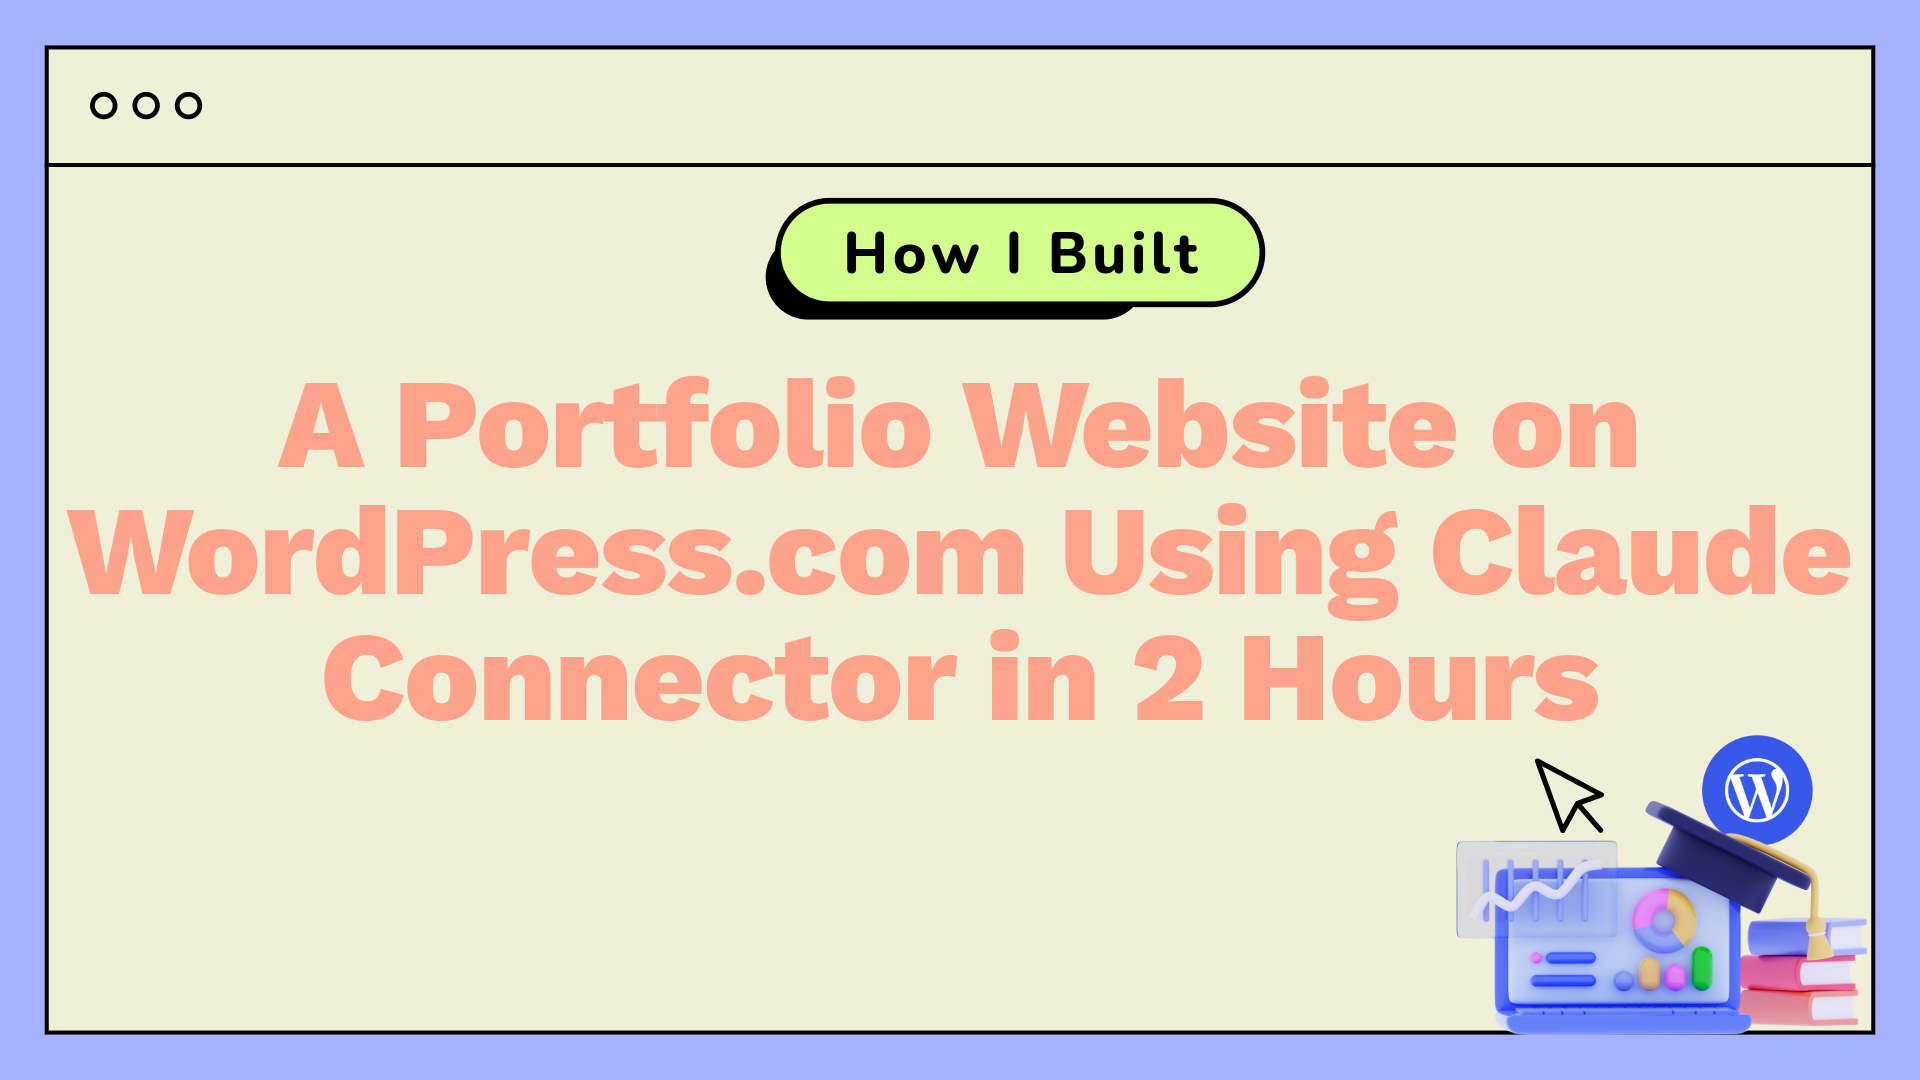
A friend asked me to build his portfolio website. He had a resume, no portfolio, and no time to figure out a page builder. I connected Claude directly to a fresh WordPress.com site through the official MCP connector and built every page through conversation.
Two hours later the site was live with a hero section, a project showcase, organized skills and certifications, and a working contact form.
Here is exactly how it went, every prompt included, nothing skipped.
What You Need Before You Start
Affiliate Disclosure: This article contains affiliate links. If you click through and purchase a WordPress.com plan, a commission is earned at no extra cost to you. The steps, observations, and recommendations in this guide are based on direct experience with the migration process and are not influenced by the affiliate relationship.
Three things, nothing more:
- A paid WordPress.com plan. For a portfolio website the personal is enough.
- A resume or bio document. It does not have to be polished. Basic info is all Claude needs to get started.
- Claude with the WordPress.com connector active and write access enabled.
Step 1: Create Your Site and Give Claude the Right Access Permissions
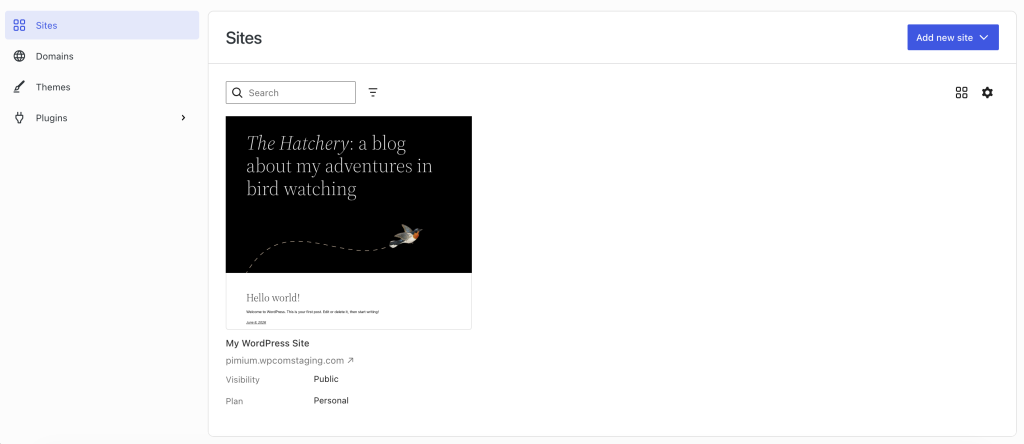
Go to WordPress.com and sign up. Pick the Personal plan. When your dashboard loads, we will be building on the default theme throughout this guide.
It is clean, loads fast, and handles a professional portfolio without needing any adjustments upfront.
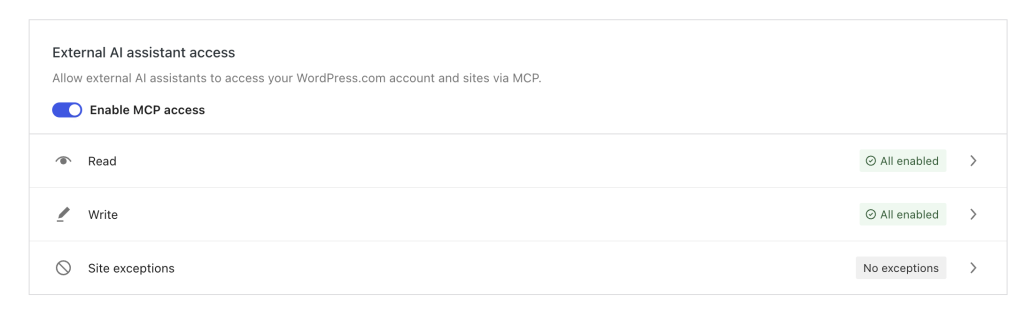
Next, go to wordpress.com/me/mcp. Toggle MCP on. Then give the “Write” tools section all the necessary permissions. This second toggle is the one most people miss. If you skip it, Claude will connect successfully but cannot create or edit anything on your site. Worth double-checking before moving on.
Step 2: Connect WordPress.com to Claude
Go to Settings > Connectors, then Browse connectors. Search for WordPress.com, click connect, and approve access through the OAuth screen. Then allow all the tools.
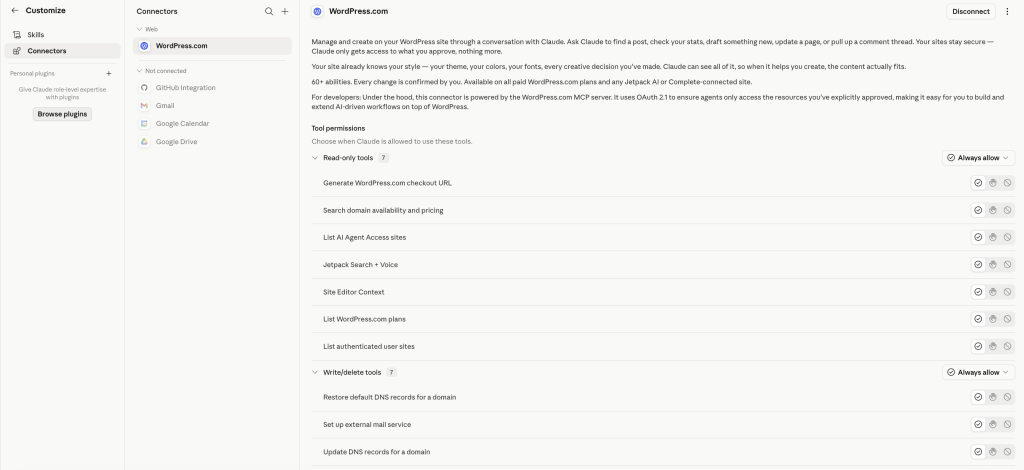
The whole thing takes about two minutes. Once it is done, Claude can see your site structure and, because write access is enabled, push content directly to it.
Step 3: Upload Your Resume and Brief Claude
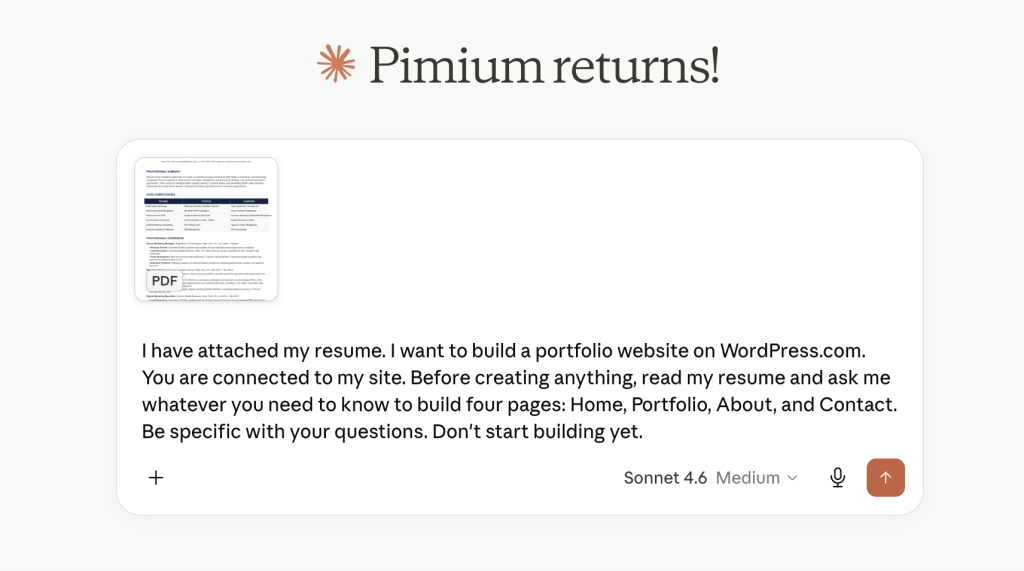
Start a new conversation in Claude. Attach your resume file. PDF and Word both work.
Your resume does not need to be a masterpiece. Even a simple document with a name, job title, a couple of past roles, and contact information gives Claude enough to work with. For the purpose of this tutorial, the name of my friend was changed.
Then send this:
Prompt 1 “I have attached my resume. I want to build a portfolio website on WordPress.com. You are connected to my site. Before creating anything, read my resume and ask me whatever you need to know to build four pages: Home, Portfolio, About, and Contact. Be specific with your questions. Don’t start building yet.”
Claude will come back with targeted questions about the type of work you want to attract, what certifications you want displayed, the tone you prefer, and what the contact form should collect. Take a few minutes to answer each one properly. Vague answers produce generic pages, and generic pages do not get people hired.
Keep everything in this single conversation thread from here through the final page. Claude carries the full context forward and that context is what makes the output feel personal rather than templated.
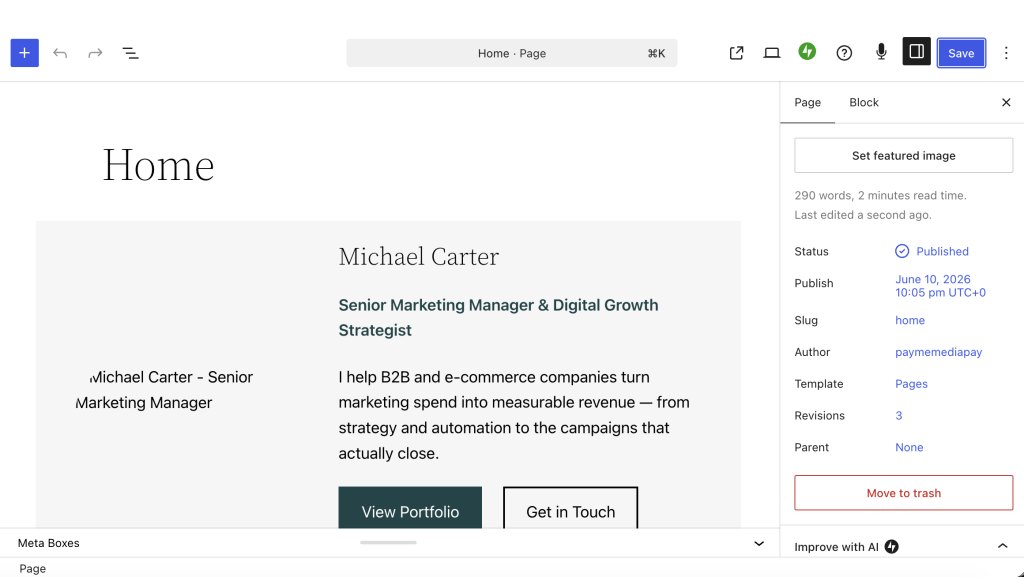
Step 4: Build the Home Page
Upload a professional photo or any image you want in the hero to your WordPress.com Media Library under Media > Add New. Copy its URL from the attachment details panel, then send this:
Prompt 2 “Create the Home page on my WordPress.com site as a draft. Structure it in three parts:
Hero section: my full name as the main heading, my job title as a subheading, and a one-sentence positioning statement written in first person based on my resume. Make it direct, not vague. Embed this image in the hero block: [paste your image URL here]. Use my site’s block patterns for the hero layout.
Below the hero: a short two-paragraph intro about my background and what I do. End with a text link to the Portfolio page.
Skills and Certifications section: organize my skills into clear categories from my resume. For each skill category, generate a simple inline SVG icon that represents it visually and place it next to the category heading. Keep icons minimal, single color, and consistent in size. Below the skills, add a Certifications section. For each certification, ask for logos. Embed each as a small inline image. Update the page and confirm.
Save as draft and confirm/ask for logos.”
After Claude confirms the page is done, open the draft in WordPress.com and scan through it before moving on. Blocks occasionally do not render correctly on the first save, particularly image blocks and SVG elements. If something looks off, click the “Attempt recovery” button to try to fix, or delete it and re-add it manually. It takes thirty seconds to fix and saves a headache later.

If there are no issues, save and publish.
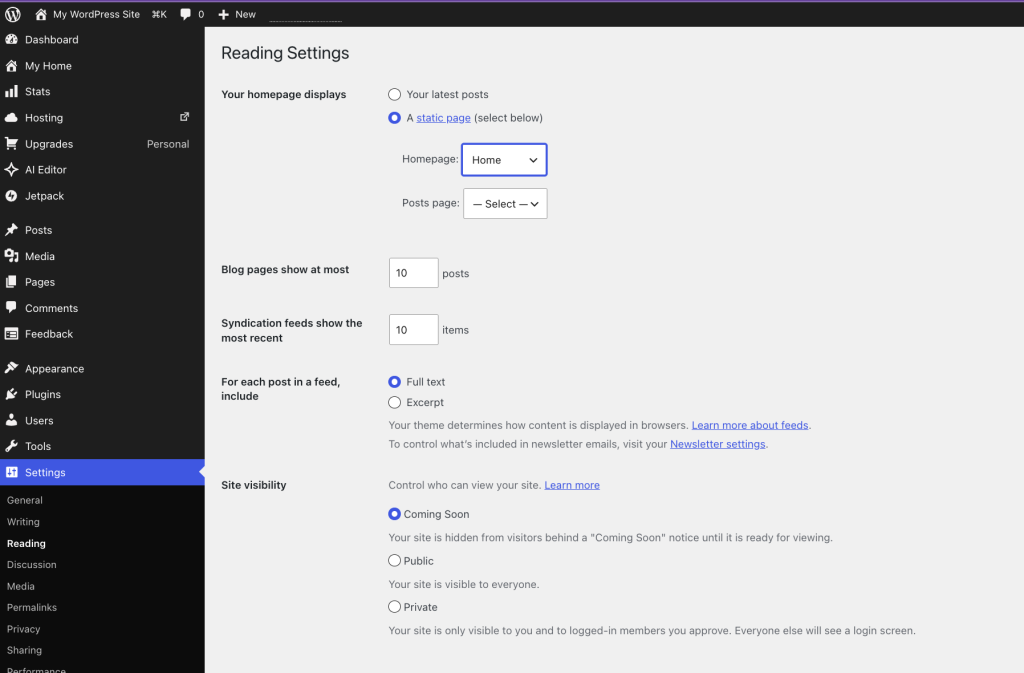
Set the front page: Dashboard > Settings > Reading > set “Your homepage displays” to a static page > choose Home.
Step 5: Build the Portfolio Page
Build the content first, then handle images in a follow-up. If your resume has no formal projects, that is fine. Claude can turn each job into a portfolio entry.
Prompt 3 “Create a Portfolio page on my WordPress.com site as a draft.
Start with an introduction and skills section.
Then for each project on my resume, create a portfolio entry structured as follows:
- Entry heading: client name and related data
- An image block at the top of the entry with placeholder alt text describing what should go there
- A short paragraph describing the project and what was delivered
Space the entries clearly so each reads as a standalone piece of work.
Add a CTA with a button to the contact page.
When the page is created, list each entry in order and ask me for the image URL /File for each one. Save as draft and confirm.”
After Claude builds the page it will prompt you for images. Before uploading, name your files project1.jpg, project2.jpg, project3.jpg and so on.
This small habit keeps things clean when you have three or four entries to manage at once.
Upload them to the Media Library under Media > Add New, copy each URL, and paste them back into the conversation. Or simply upload them to claude directly when asked.
Prompt 3b (Claude sends this automatically, but if it does not, send it yourself) “Now embed the project images into the Portfolio page. Here are the URLs in order: project1 – [URL], project2 – [URL], project3 – [URL]. Update the page and confirm.”
Same as before, open the draft after Claude confirms and do a quick check on each image block. If anything renders incorrectly, the “Attempt recovery” button sorts it out in seconds.
Publish when done.
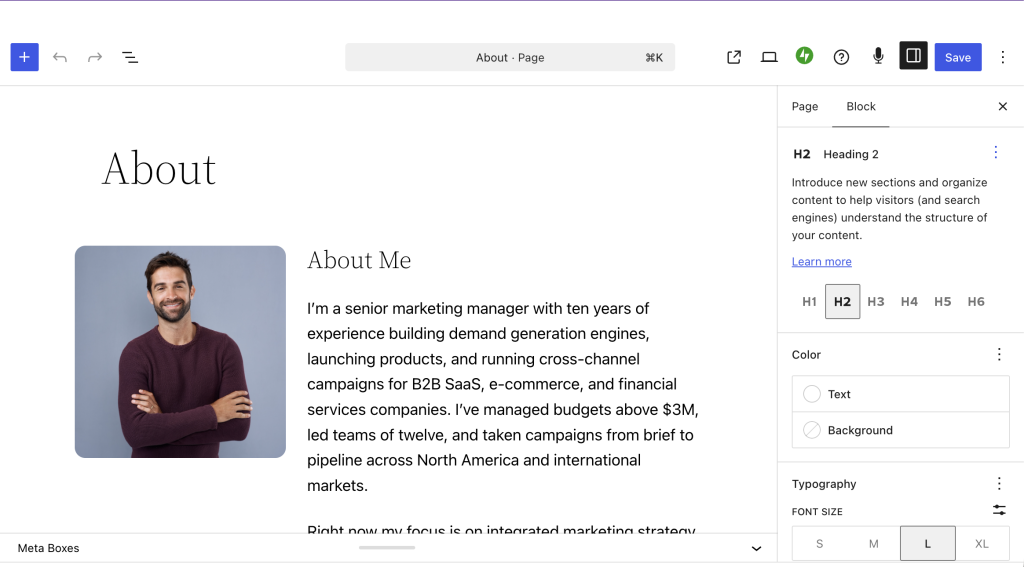
Step 6: Build the About Page
Upload your profile photo to the Media Library and copy its URL. If you have logos for previous employers you want in the skills snapshot, upload those too. Then send this:
Prompt 4 “Create an About page on my WordPress.com site . Structure it in two parts:
Bio section: embed a profile photo at the top: [your profile photo URL].
Below it, write two to three short paragraphs in first person. Cover my background, what I focus on now, and what drives the work. Keep it direct, not sentimental. End with one sentence stating what type of work I am open to, with a text link to the Portfolio page and a text link to the Contact page.
Add the certifications and skills sections.
Add eduction, awards and languages section.
Build the Work Experience section and then ask for logos.
Save as draft and confirm.”
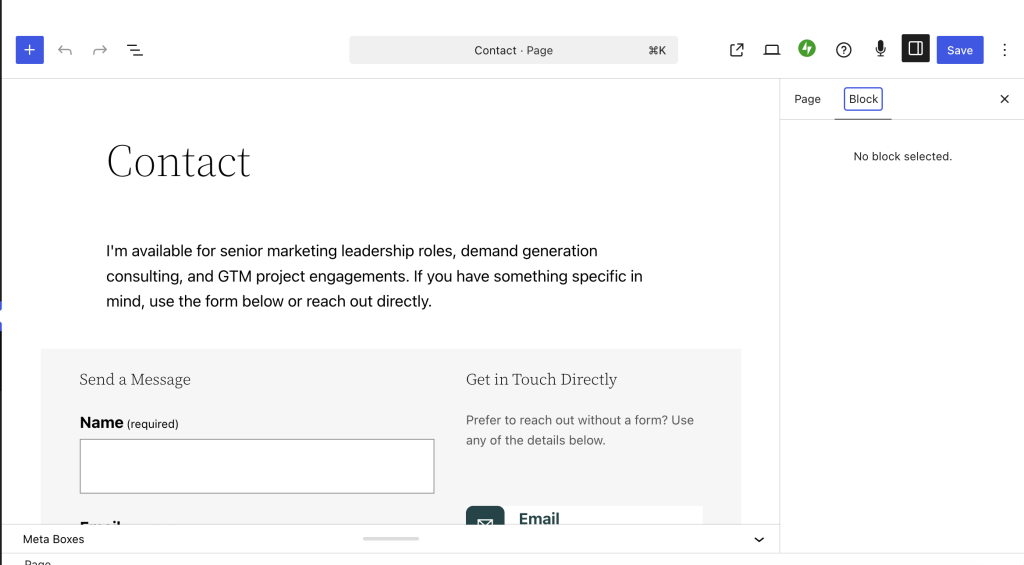
Step 7: Build the Contact Page With a Working Form
Prompt 5 “Create a Contact page on my WordPress.com site.
Include:
A short two-sentence intro stating what type of work I am available for.
A contact form with these fields: Name (required), Email (required), Subject with a dropdown offering three options based on my work type, Message (required), and a Submit button labeled ‘Send Message’.
Next to the form, add my contact info and links for anyone who prefers it.
Use my site’s built-in form block or Jetpack contact form. Save and confirm.”
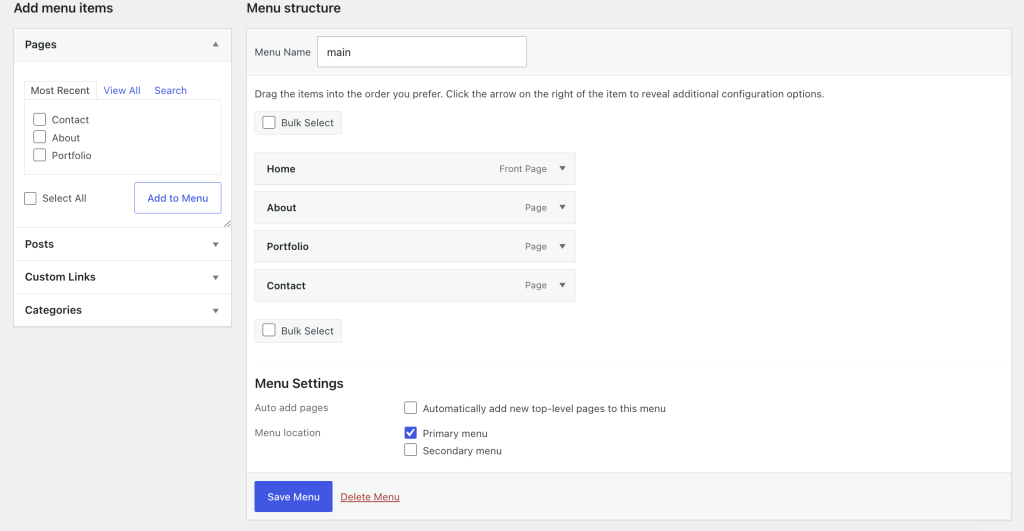
Step 8: Set Up Navigation\Footer and Publish
Two tasks Claude cannot do through the connector. All inside the WordPress.com dashboard, under five minutes total.
Set the front page: Dashboard > Settings > Reading > set “Your homepage displays” to a static page > choose Home.
Build the menu: Dashboard > Appearance > Menus > create a new menu > add Home, Portfolio, About, Contact in that order > set it as the primary menu.
What to Expect Along the Way
Images go through your Media Library. Claude may use a lot of ressources to upload images, so upload anything visual to WordPress.com first and share the link. It keeps every asset properly hosted on your site.
Claude may occasionally reach its usage limits. When handling a large number of requests or resource-intensive tasks. When this happens, you may need to wait a short period before continuing your work. Upgrading to a paid subscription can provide higher usage limits and help reduce waiting time.
Stay in one conversation and check your blocks. Run the entire build from Step 4 through Step 8 in a single Claude thread. Closing and starting fresh mid-build loses your resume context. Also open each draft after Claude confirms it and do a quick scan. Image and SVG blocks occasionally render incorrectly on first save. The Regenerate option in the block toolbar fixes it in seconds.
WordPress.com Connector issue. While the WordPress MCP connector is generally reliable, some users may experience occasional authentication issues. For example, Claude may repeatedly request permissions for the same WordPress site, and the WordPress.com login process can sometimes fail unexpectedly, requiring reauthorization before work can continue.
The Real Time Breakdown
Two hours is accurate but most of it is not active work. Setup, MCP configuration, and connecting Claude takes about ten minutes. The briefing exchange with Claude runs another ten to fifteen, and that time is yours writing answers specific enough to produce useful output. Page generation runs five to ten minutes per page, so across four pages you are waiting up to forty minutes while Claude works. Uploading images, naming files, and sharing URLs back adds another fifteen to twenty minutes depending on how many portfolio entries and certifications you have.
Active hands-on work sits under an hour. Total elapsed time including Claude’s processing is ninety minutes to two hours.
Your Portfolio Is One Conversation Away
My friend went from zero to a live portfolio in an afternoon. We sent Claude his resume, answered a handful of questions, and shared a few image URLs as the build progressed. Claude handled the writing, structure, and page creation. The result was a real site with a hero section, structured project entries, organized credentials with logos, and a contact form that works.
The Personal plan costs less than a lunch out. The build fits inside an afternoon. If a proper portfolio has been sitting on your to-do list for too long, this is the fastest honest way to get it done.
Your website is often the first impression customers have of your brand. Invest in a WordPress.com plan and give your personal the professional edge it deserves with premium features, advanced customization, and reliable hosting built for growth.